Hatch Door MON
Monday, September 4th, 2023 12:51 pm |
I managed to be on my feet before noon today, rather than 2PM, so that was a bit of a victory, but it was already 86F when I got outside with Yvette. While we were sitting out in the back yard, I opened up the shed and got my dolly out. Then when we went to come back inside, I brought it with me to the side porch door.
After feeding Yvette, instead of starting this entry, I went back out to the porch, got the new door off the saw horses, got it outside, and wheeled it around to the basement entrance.
I then laid it down over the hatch and adjusted it so that the center hinge is fairly well lined up with the three holes I marked from the old hinge.
But by then it had already gone up to 88F, and just that amount of work had me sweating bullets, so now I'm in the back room cooling off.

Okay!.. the door is fastened to the house by all three hinges!
I started the screws in the center hinge holes first and then adjusted the door a bit more... then drilled pilot holes for the left and right hinges and got those screws started... then more adjusting until all nine screws were home.
And just that amount of work... out there in 89F, with the blazing sun on me... again had me sweating bullets.
Happily though, the hardest part of the job is now over.
The old door is off, and gone.
The new door is attatched.
Now I get to go down into the cool basement and work on the counterweights for an hour or two.
Okay!.. the counterweights are together, down in the shop, drying out.
The first thing I did was dump all the gravel from the OG counterweight into a bucket, which I then weighed on a bathroom scale... and it came in at 20 pounds.
Then I poured some of that gravel into a second bucket, until what was in the first bucket weighed in at 10 pounds.
Then I dumped that 10LBS of gravel into a 4" PVC pipe with an endcap dryfit at the bottom... and this gave me an idea how short to cut the pipe.
So I dumped the gravel back into the bucket, and cut the pipe with a hacksaw.
I put on the topcap, dryfit, and dumped the gravel back in, to make sure it would all fit.
After that I eyeballed where to cut the old counterweight.
I was keeping the top part of it and replacing the bottom endcap, so I cut it at the bottom... dryfit the new endcap and stood the two side by side.
One is slightly taller than the other, but... close enough for government work, as they say.
I dumped the gravel from the other bucket into this one to make sure that would also fit.
And it turned out there was more gravel in the second bucket than the first one???
I think my weight measurement was being thrown off by quite a bit of water inside the OG counterweight.
The eybolt on top of that was letting rain in, same as the eyebolt for HD1.0... and it's possible it was also getting in around the edge of the screw-top.
I had drilled some air holes near the bottom of the OG counterweight, to equalize the air pressure inside and outside of it... but those holes weren't designed to drain any water.
But the new hatch door weighs less than the old one anyway, because it's 1/2 inch plywood, rather than 3/4 inch.
So the two new weights didn't need to hold all the gravel from the original one.
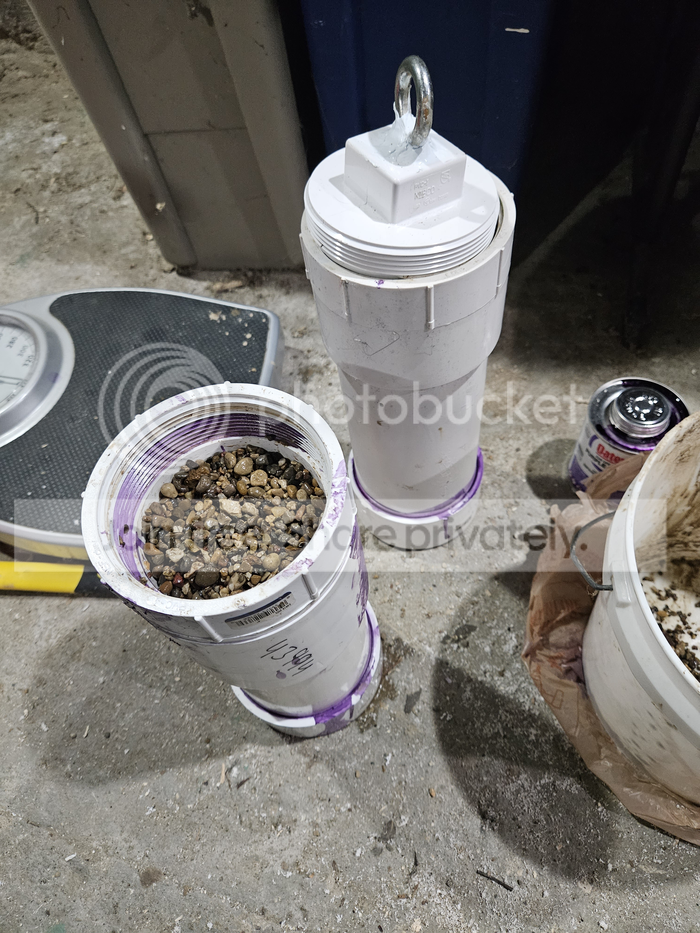
Here are the two new counterweights, after having been glued together, with the gravel put into both of them. Both of them wound up weighing 14 pounds.
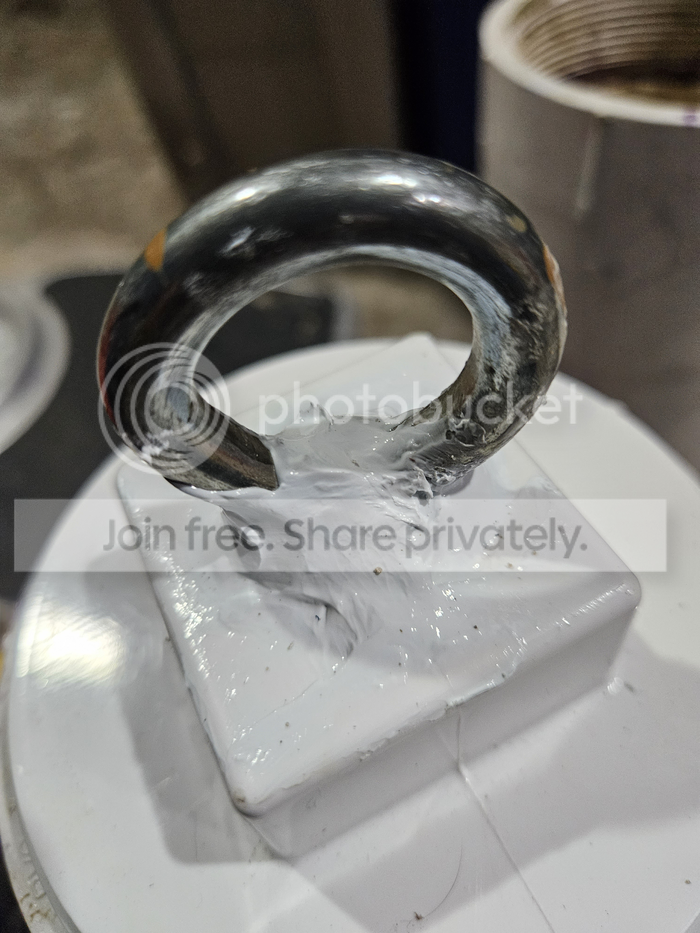
I sealed around the eyebolts of both of them with outdoor grade caulk.
This is more to protect the eye bolts, and their washers & nuts from rusting away, than it is to keep out rainwater, which will still probably seep in a bit around the edges of the caps.

For that, I drilled five small holes in the bottoms of both of them, to drain off any water that does get inside... and also to equalize the air pressure, as temperatures change.
Once the gravel was in both of the new weights, water did immediately start leaking out of those drain holes... so they do work.
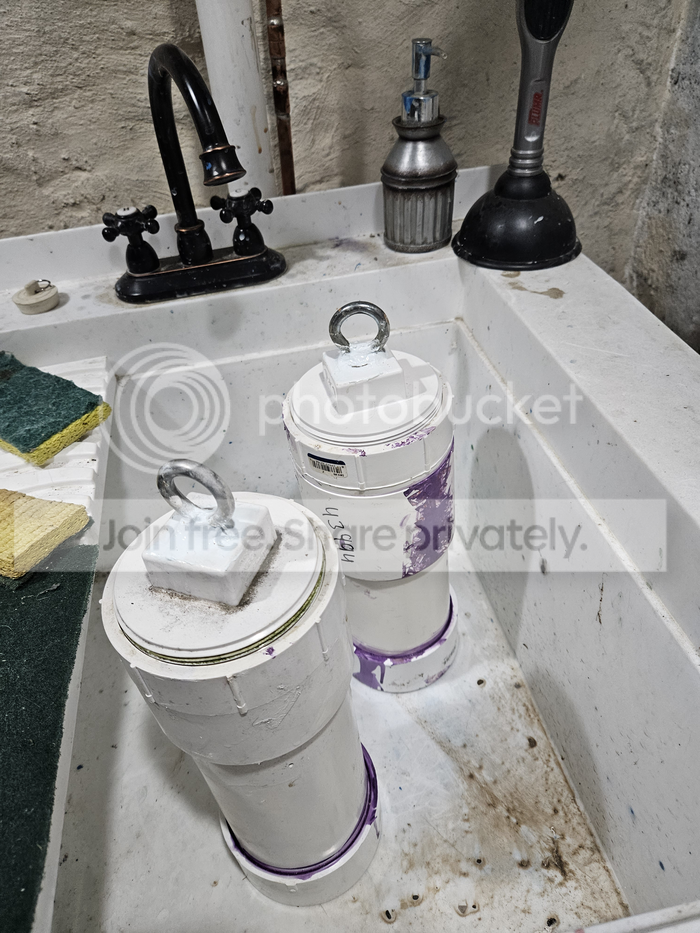
So now the two weights are sitting in the slop sink to drain more, and I'm also waiting for the glue and the caulk to dry.
I'm also not fully screwing those caps in until after I test them with the door.
It's possible they're too heavy, so I want to be able to empty out some gravel from both, if that's necessary.
Pretty soon it will be time for a beer run, and then a dog walk.
I got back from my beer run just before 5PM, and then Yvette and I went out for what turned out to be a 45 minute walk!.. in the hottest part of the day!
So I did have to cool off after the walk and then finaly got set up out back for the final push to finish this project.
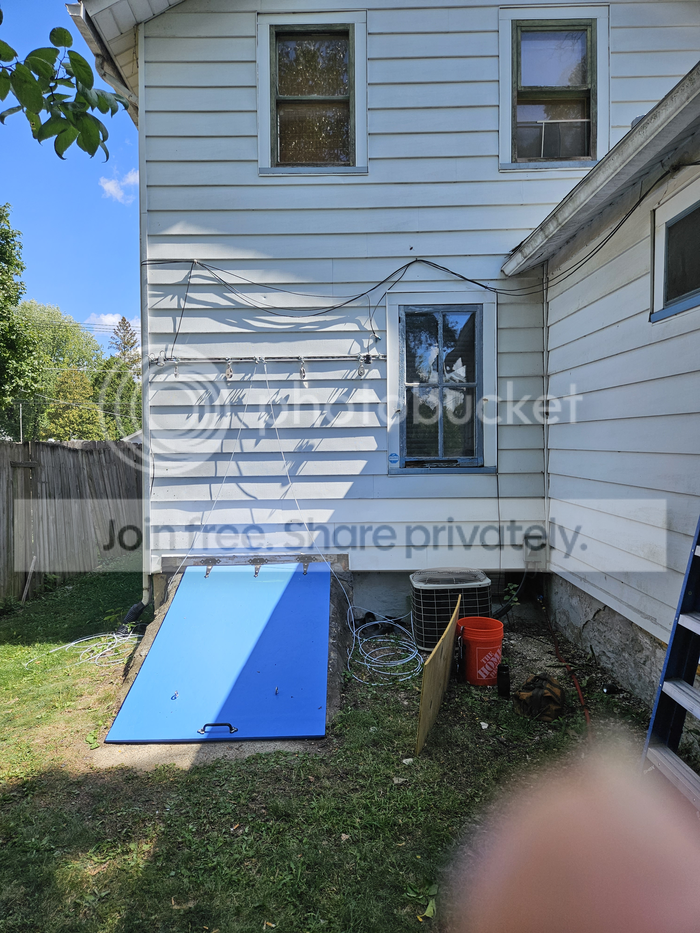
The basement hatch area was in shade by that point, but it was still 90F, and I did sweat bullets the entire time... as I strung up the rigging, hung the counterweights... tested it out... and, when I found that it worked, replaced the rubber flashing.
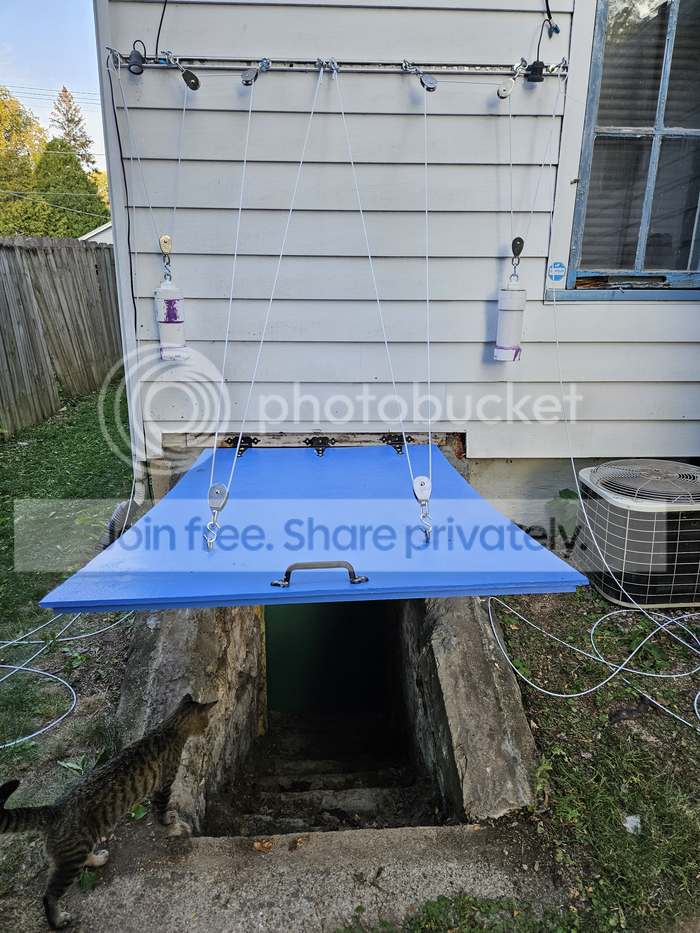
This was the first test, when the far left & right fixed points were still just holding on with zip ties... but the weights were holding the door!
So I adjusted the lines a bit more and put on the permanent fasteners.
This is after the permanent fasteners, with the door open as far as it used to go.
I was happy to see that both weights still had plenty of drop space, and therefore the left weight hitting the side of the stairwell would not be an issue.
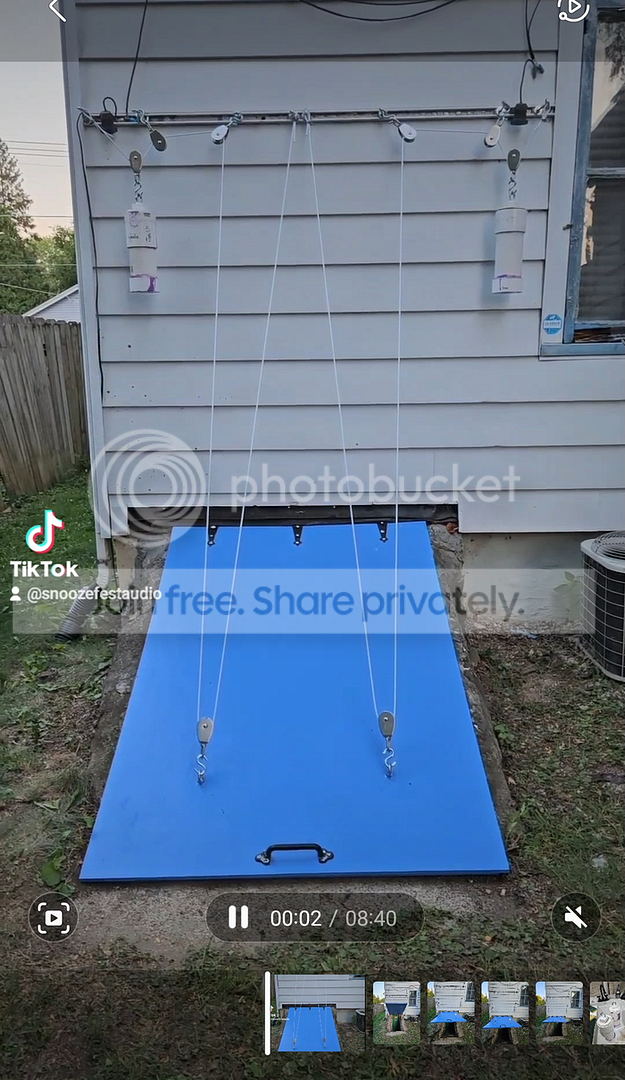
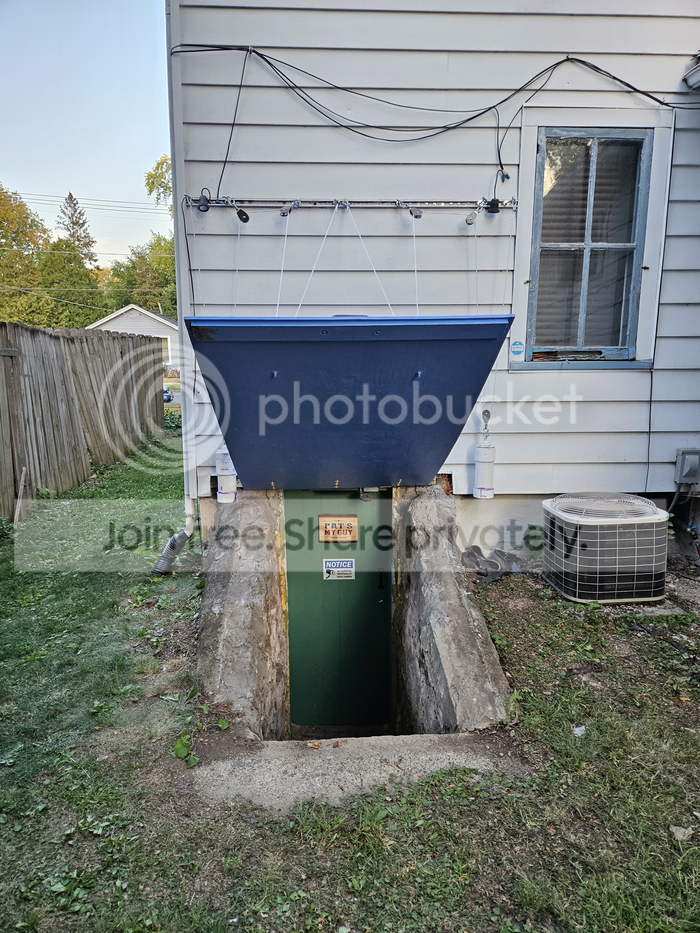
I got the rubber flashing back on, and then made a TikTok about it.
The caps to the counterweights still need to be screwed all the way down, and I need to adjust the spacing of the unistrut hardware to make the door's travel more smooth on the way down.
On the way up it's fine, but it's currently kinda wobbly on the way down.
But that's all fine tuning.
The main thing is that I DID manage, just barely, to get this goddam door installed and functional over the Memorial Day weekend... despite it being 90F all three days!
It ate up the whole of the three days, and it's dark out there now, as I finish up this entry. But it's done!
It can rain tomorrow and Wednesday all it wants now, and I can move on to the storm windows!
°¦}